About Lemur How to make a customized interface

Reading the introduction to Lemur I found out that Lemur has a customizable interface.

jMonkeyEngine-Contributions/Lemur: Lemur is a jMonkeyEngine-based UI toolkit. (github.com)

687474703a2f2f692e696d6775722e636f6d2f786c686244674c2e706e67
687474703a2f2f692e696d6775722e636f6d2f357746463459592e706e67

创建自定义 GUI 元素 ·jMonkeyEngine-Contributions/Lemur Wiki (github.com)

When I wanted to know how he customized the interface I found that the documentation doesn’t seem to be ready yet, where should I get the information?

Maybe I’m missing something. I hope this gives me a hint.

thanks.

By “customization” I guess you mean “custom styling”. The Lemur wiki has information on that.

2 Likes
/*
 * Click nbfs://nbhost/SystemFileSystem/Templates/Licenses/license-default.txt to change this license
 * Click nbfs://nbhost/SystemFileSystem/Templates/Classes/Class.java to edit this template
 */
package GUI;

import CameraAndMouse.CamAndMouseCur;
import com.jme3.app.Application;
import com.jme3.app.SimpleApplication;
import static com.jme3.app.SimpleApplication.INPUT_MAPPING_EXIT;
import com.jme3.app.state.BaseAppState;
import com.jme3.asset.AssetManager;
import com.jme3.font.BitmapFont;
import com.jme3.input.InputManager;
import com.jme3.math.ColorRGBA;
import com.simsilica.lemur.Button;
import com.simsilica.lemur.Command;
import com.simsilica.lemur.Container;
import com.simsilica.lemur.GuiGlobals;
import com.simsilica.lemur.Label;
import com.simsilica.lemur.TextField;
import com.simsilica.lemur.component.QuadBackgroundComponent;
import com.simsilica.lemur.style.Attributes;
import com.simsilica.lemur.style.BaseStyles;
import com.simsilica.lemur.style.Styles;
import java.util.logging.Logger;

/**
 *
 * @author Icyboxs
 */
public class UI extends BaseAppState{
   private static Logger log =Logger.getLogger(UI.class.toString());
    private InputManager inputManager;
    private AssetManager assetManager;
    private SimpleApplication simpleApp;
    private BitmapFont font;
    private Attributes attrs;
    @Override
    protected void initialize(Application aplctn) {
       simpleApp = (SimpleApplication) aplctn;
        assetManager = aplctn.getAssetManager();
        inputManager = aplctn.getInputManager();
        inputManager.deleteMapping(INPUT_MAPPING_EXIT);
        GuiGlobals.initialize(simpleApp);
        BaseStyles.loadGlassStyle();
       // GuiGlobals.getInstance().getStyles().setDefaultStyle("glass");
       // font = assetManager.loadFont("Textures/font/FontCJK/fontCJK.fnt");
        //GuiGlobals.getInstance().getStyles().setDefault(font);
Styles styles = GuiGlobals.getInstance().getStyles();
attrs = styles.getSelector("glass");
attrs.set("fontSize", 14);

QuadBackgroundComponent bg = new QuadBackgroundComponent(new ColorRGBA(0, 1, 0, 1));
attrs = styles.getSelector("button", "glass");
attrs.set("color", new ColorRGBA(0.5f, 0.75f, 0.75f, 0.85f));
attrs.set("background", bg);

font = assetManager.loadFont("Textures/font/FontCJK/fontCJK.fnt");
attrs = styles.getSelector("slider", "button", "glass");
attrs.set("fontSize", 10);
attrs.set("font", font);

    }

    @Override
    protected void cleanup(Application app) {
   
    }

    @Override
    protected void onEnable() {
        // Create a simple container for our elements
        Container myWindow = new Container();
        simpleApp.getGuiNode().attachChild(myWindow);

// Put it somewhere that we will see it.
// Note: Lemur GUI elements grow down from the upper left corner.
        myWindow.setLocalTranslation(0, 1000, 0);
TextField textField = new TextField("这是一段测试文本");
	textField.setFontSize(25f);
// Add some elements
Label label=new Label("Hello, World.");
//label.setFont(font);
label.setFontSize(25f);
label.setColor(ColorRGBA.Blue);
        myWindow.addChild(label);
        myWindow.addChild(textField);
        Button clickMe = myWindow.addChild(new Button("中文"));
        clickMe.addClickCommands(new Command<Button>() {
            @Override
            public void execute(Button source) {
                System.out.println("中文");
                simpleApp.stop();
            }
        });
    }

    @Override
    protected void onDisable() {
   
    }
    
}

Styles styles = GuiGlobals.getInstance().getStyles();
attrs = styles.getSelector("glass");
attrs.set("fontSize", 14);

QuadBackgroundComponent bg = new QuadBackgroundComponent(new ColorRGBA(0, 1, 0, 1));
attrs = styles.getSelector("button", "glass");
attrs.set("color", new ColorRGBA(0.5f, 0.75f, 0.75f, 0.85f));
attrs.set("background", bg);

font = assetManager.loadFont("Textures/font/FontCJK/fontCJK.fnt");
attrs = styles.getSelector("slider", "button", "glass");
attrs.set("fontSize", 10);
attrs.set("font", font);

I set these but they don’t work I don’t understand how “Attributes” should be used.
I hope you can use some pseudo-code to briefly explain how to use “Attributes”.
Thanks in advance.

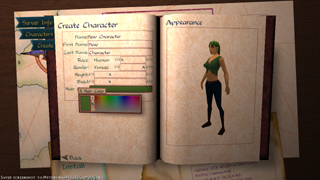
I can show what I have learned while working on my game, Depthris.

I first define the style with a custom name and give some attributes which will be common to many UI elements.

Styles styles = GuiGlobals.getInstance().getStyles();
Attributes attributes = styles.getSelector("my_style");
attributes.set("font", assetManager.loadFont("Fonts/myFont.fnt"));
attributes.set("color", ColorRGBA.White);
attributes.set("fontSize", 14)

I then I create attributes for a header Label that I want. It inherits the common attributes defined above but I can also overwrite them if needed, like the font size in this case

attributes = styles.getSelector("header", "my_style");
attributes.set("textHAlignment", HAlignment.Center);
attributes.set("textVAlignment", VAlignment.Center);
attributes.set("fontSize", 23);

......

// Now to use it I declare a Label with the style and id I created:
Container container = new Container();
container.setPreferredSize(new Vector3f(400, 100,0));
guiNode.attachChild(container)

Label title = new Label("Hello World!!!", new ElementId("header"), "my_style");
container.addChild(title);

If you want to declare a style for all labels you use Label.ELEMENT_ID like this example

attributes = styles.getSelector(Label.ELEMENT_ID, "my_style");
attributes.set("textHAlignment", HAlignment.Right);
attributes.set("fontSize", 23);


....
// In this case you don't need to use the ElementID parameter since it will use the default one
Label label= new Label("Have a nice day! ", "my_style");
container.addChild(label);

You can declare styles for any Lemur UI element you need. you don’t need to use the default glass one if you don’t want to. You can use some elements with the default glass style and some of your custom one without issues.

I learned most of it reading through the docs and some trial en error until I got it . I hope it helps

2 Likes

It’s easier to define styling in a groovy styles file. Easiest way is to copy the glass styles file to a different name and just change stuff until your GUI looks like you want it.

It can be done in Java code, too, but it’s much more verbose and maybe not always as clear what’s going on.

In your first example setting the global font size to 14 may not have any effect once the style has been loaded because other components may have already defined their size. It can be tricky to mix a style this way because defaults have already been setup. You have to be very specific if you are loading another style like ‘glass’ and just adding to it. The second part of your stuff should have worked but I don’t what you create or how you know it didn’t change.

In this live stream, I create a new style for the Mythruna UI: Mythruna - Coding - UI Styling - YouTube

3 Likes

Thank you so much for your help, this gives me a quick overview of lemurs! :smiling_face_with_three_hearts: :smiling_face_with_three_hearts: :smiling_face_with_three_hearts:

1 Like

I’ve never used groovy before I’ve tried using code to modify styles and groovy to modify styles, both work well using groovy to modify styles feels like writing CSS again. :grinning: :grinning:

I’ve seen and read the groovy documentation, and I’ve realized that groovy seems to be a lot like python, but of course I don’t know all of it yet. :slightly_smiling_face:

You can use Groovy to make a styles file, but in my case I was getting an error running the “Groovy Engine” so I had to write the style in Java code (you can have better luck). I just made a separate Java class that only creates a style for all my components and called it once in my game.

1 Like

Groovy is just Java++. It’s Java code with some of the more common things built into the syntax. But it’s also good for making “domain specific languages” like the style files.

This is on purpose. It’s supposed to feel like CSS even though it can’t be exactly like CSS.

The cascading is there but HTML and Lemur calculate “parent/child” in different ways. In HTML, parent/child is a function of how the page is organized. In Lemur, it’s based on how the element IDs are created… and nothing enforces what that means. The usual convention is to use it like CSS would.

By convention:
“window.close.button” I would think of as the “button” of the “close” element of the “window” container.

ElementId has the child() method to make this easier when you are making your own composite elements.

Pseudo code might look like:

ElementId windowId = new ElementId("window");
Container window = new Container(windowId);
Button close = window.addChild(new Button(windowId.child("close.button")));

From that I could style all “button” elements with “button”. I could style close-specific elements with “close”. I could style close-button specific elements with “close.button” and I could style all buttons on a “window” with “window.button”. (“window.*.button” is generally implied)

The precedence on how it decides which one to use if multiple paths are found is longer than I should include here… but mostly it doesn’t come up and when it does a specific style “window.close.button” will always override more general ones. (Pretty sure the wiki page goes over this some.)

2 Likes