After a second glance, it looks like there is no light probe actively lighting the ball, which is why the side facing away from the directional light is unlit. You will also see much more shininess and reflectivity when you add the light probe, as it is essentially the ambient light for the scene that is used for simulating the nice indirect lighting effects of pbr.
1 Like
@yaRnMcDonuts thanks for the additions ![]() , I will try that
, I will try that ![]() , i am currently adding a SpotLight or a PointLight I cannot remember , may be that was the problem , though what is the major difference between a PointLight & LightProbe , do both of them simulate the light lamp ?
, i am currently adding a SpotLight or a PointLight I cannot remember , may be that was the problem , though what is the major difference between a PointLight & LightProbe , do both of them simulate the light lamp ?
A Light Probe is somewhat different from normal lights (SpotLight, Point Light, DirectionalLight).
Those 3 are good for simulating single light sources, such as a Lamp, Street Light, or the sun.
But the light probe is used for faking reflectivity and indirect light, so it will light the scene similar to an AmbientLight but with much better graphical results. This video is great for learning more about light probes

I also always recommend these 3 articles (especially the first one) in the wiki to anyone who really wants to understand the way PBR works - the 2nd and 3rd are definitely more information than is needed to implement basic PBR, but I believe it did help me a lot to know these things in the long run.
2 Likes
That video was really informative ![]()
![]()
I have taken a quick pass on the wiki before I post those PBR photos , but found out that the wiki did not actually give a good idea about PBR in a specific jme context whether code(as samples) or concepts(as grizeldi videos) , so I have understood most of code from git code samples , & no one really mentioned that to use LightProbes , you Must Use EnvironmentCamera or 360SnapShots , I am currently having a NPE with it , if you have examples of EnvironmentCamera or LightProbeFactory, please share
1 Like
3 Likes
Tonight I added texture previews to Maud.

18 Likes

My first game. The aim is to create a small MMORPG game like Lineage 2, that is used as a reference.
Already implemented:
a first character model
first animation of moving
a couple of skills with damage to NPC
basic target system
hp/mana system
basic system of experience gain.
All comments and ideas are appreciated.
")
11 Likes
@EvilSpirit well, its nice you create some mmo game, but generally my advice for you would be to:
- use ECS (if you dont)
- 0,0,0 point to be always near player to avoid float accuracy lose.
-
do not try create big game, try with smaller first.(but i assume its too late to say it now…
There are a lot of knowledge that new devs might not even know about them. Not mentioning that mmo networking require a lot of knowledge to allow many users play game at same time. Not even mentioning about game-name Wipo/eupio/ustm TM that for mmo game is like a must - so i hope you get what i mean - that i could add 99+ “not mentioning” things for a bigger game)
When you will create models, you should also make them in PBR standard(GLTF can help here)
Terrain you can also find PBR one here on forum.
Usefull keywords for you:
- Geom batching
- PBR
- Topology
- shape keys (optional - lipsync/etc)
- LOD
- ECS
- Effekseer(optional)
- Minie(preferred - for better ragdolls/IK/movement/Cloth physics/etc)
- Navmesh(recast4j / jme-ai)
- Lemur GUI(optional)
- frame per second important: drawCalls(geom amount) / Tris amount / shaders / your code in update()
- Java threads / JME app.enqueue()
- Network ( spidermonkey / Monkey-netty )
- Sonnis / Sketchfab - good sound/models sites.(optional)
dont remember more now, but this ones for sure could be helpfull.
3 Likes
@oxplay2, Thanks a lot,
I started with single player app now, and plan to make transition to network app later.
Is it correct approach or is it better to separate client and server at the beginning of development?
if you plan to have network in later stage, it would be better to “single player = single person multiplayer” (as i know its proper way and will save a lot of work in future, since its much different solution)
1 Like
Just note: when folks make a statement like this, “transition to network app later” means “rewrite from the beginning later”.
I always worry about these posts because I think we end up losing cool people because they get frustrated with their impossible task and just give up. And I wonder how many people gave up on woodworking after several months of trying to make a grand piano from scratch.
But if it’s just something to poke at, learn from, and never really finish before picking a different project then it could be good.
10 Likes
In fact, everyone knows the truth, but few people really stick to it.After the initial passion disappears, very few people can continue to work hard at the end of the tunnel where no light can be seen.
2 Likes
I just finished my game. It only took me 6 years of intense learning of computer science concepts so I’m able to produce a game in 6 months. 
Yay we did it JMonkey I believed in you. 
Going to sleep now. I’ll be posting as per usual later. 
7 Likes
I’ve spent the month working on tools. It always feels like standing still when you really want to get to the fun stuff but I kept having to remind myself that it will pay off.
Most of the time has been spent on a tool that will let me put together block sets, textures, etc. and then save them out in compact serialized form. (A bunch or Lemur improvements related to this.) In “Old Mythruna”, I built up the blocksets and geometry with .groovy scripts which was fine but a) it was a non-trivial amount of time for the scripts to run every time and b) testing geometry+texture issues “in game” was a giant pain. Run game, wait for it to load, select the menus (pre-quick launch), wait for the world to load, find the spot where the issue was, test the changes, repeat.
It’s definitely nicer to boot up the Shaper tool which only takes 5 seconds to get to what I need to see. Then for advanced testing, I have BlockEd2 which works with the name block set files directly.
Today these tools paid for all the time I’ve spent on them x10. I added the wedge blocks and then added some code to automatically rotate block geometry to make the different 90 degree rotations. I spent 3-4 hours tracking down odd rotation issues, tangent problems, etc… would have easily taken me weeks before. Or I’d have spent at least a day per bug then gotten tired of it, working on the next bug the next day, and so on. Fixing these 10-12 bugs would have take at least a week.
Where as I was easily able to track down down with the Shaper tool as a tester and some nice TBN debug views and one of my old ‘normal map testing’ textures.

(Turns out Mythruna’s shingles texture is also good for testing tangents as the normals and bumps are really dramatic and obvious when moving the wrong direction.)
And here I added some slope blocks and some half and quarter blocks to the block set and goofed around for a few minutes in BlockEd2.

Shape selection is still kind of klunky but “functional enough” for what I need.
Barring additional complications, I should be able to build out most of the other Mythruna block types over the next few days… including adding some groovy scripts for the really odd cases like the thatch blocks.
16 Likes
Continuing the trend of “debugging tools”, in the midst of other tool changes, I added a light value debugger. Light propagation is a pain to debug no matter how you slice it. Looking at the raw values is very useful, especially for colored light and strange filter/attenuation situations.
This view will show a sun, r, g, b hex value for each cell with non-zero or non-full sun light. And it fades with distance from a focal range.
Far:

…barely visible.
Closer:

Still closer:

…very near values fade away again so it’s easier to focus on the near/mid range values.
Same view but I added a light inside the building and you can see the values change:

Taking a look inside:

I will probably make the focus point and range configurable through the UI at some point but this gets me what I need today. Someday I will also add controllable clipping planes, too, to allow easier peeling away of buildings without moving inside.
…but BlockEd is a means to an end and only really ever needs the features I need “right now”.
Edit: note that it’s a lot clearer what value is where when you are moving around since they are billboarded into their cell.
8 Likes
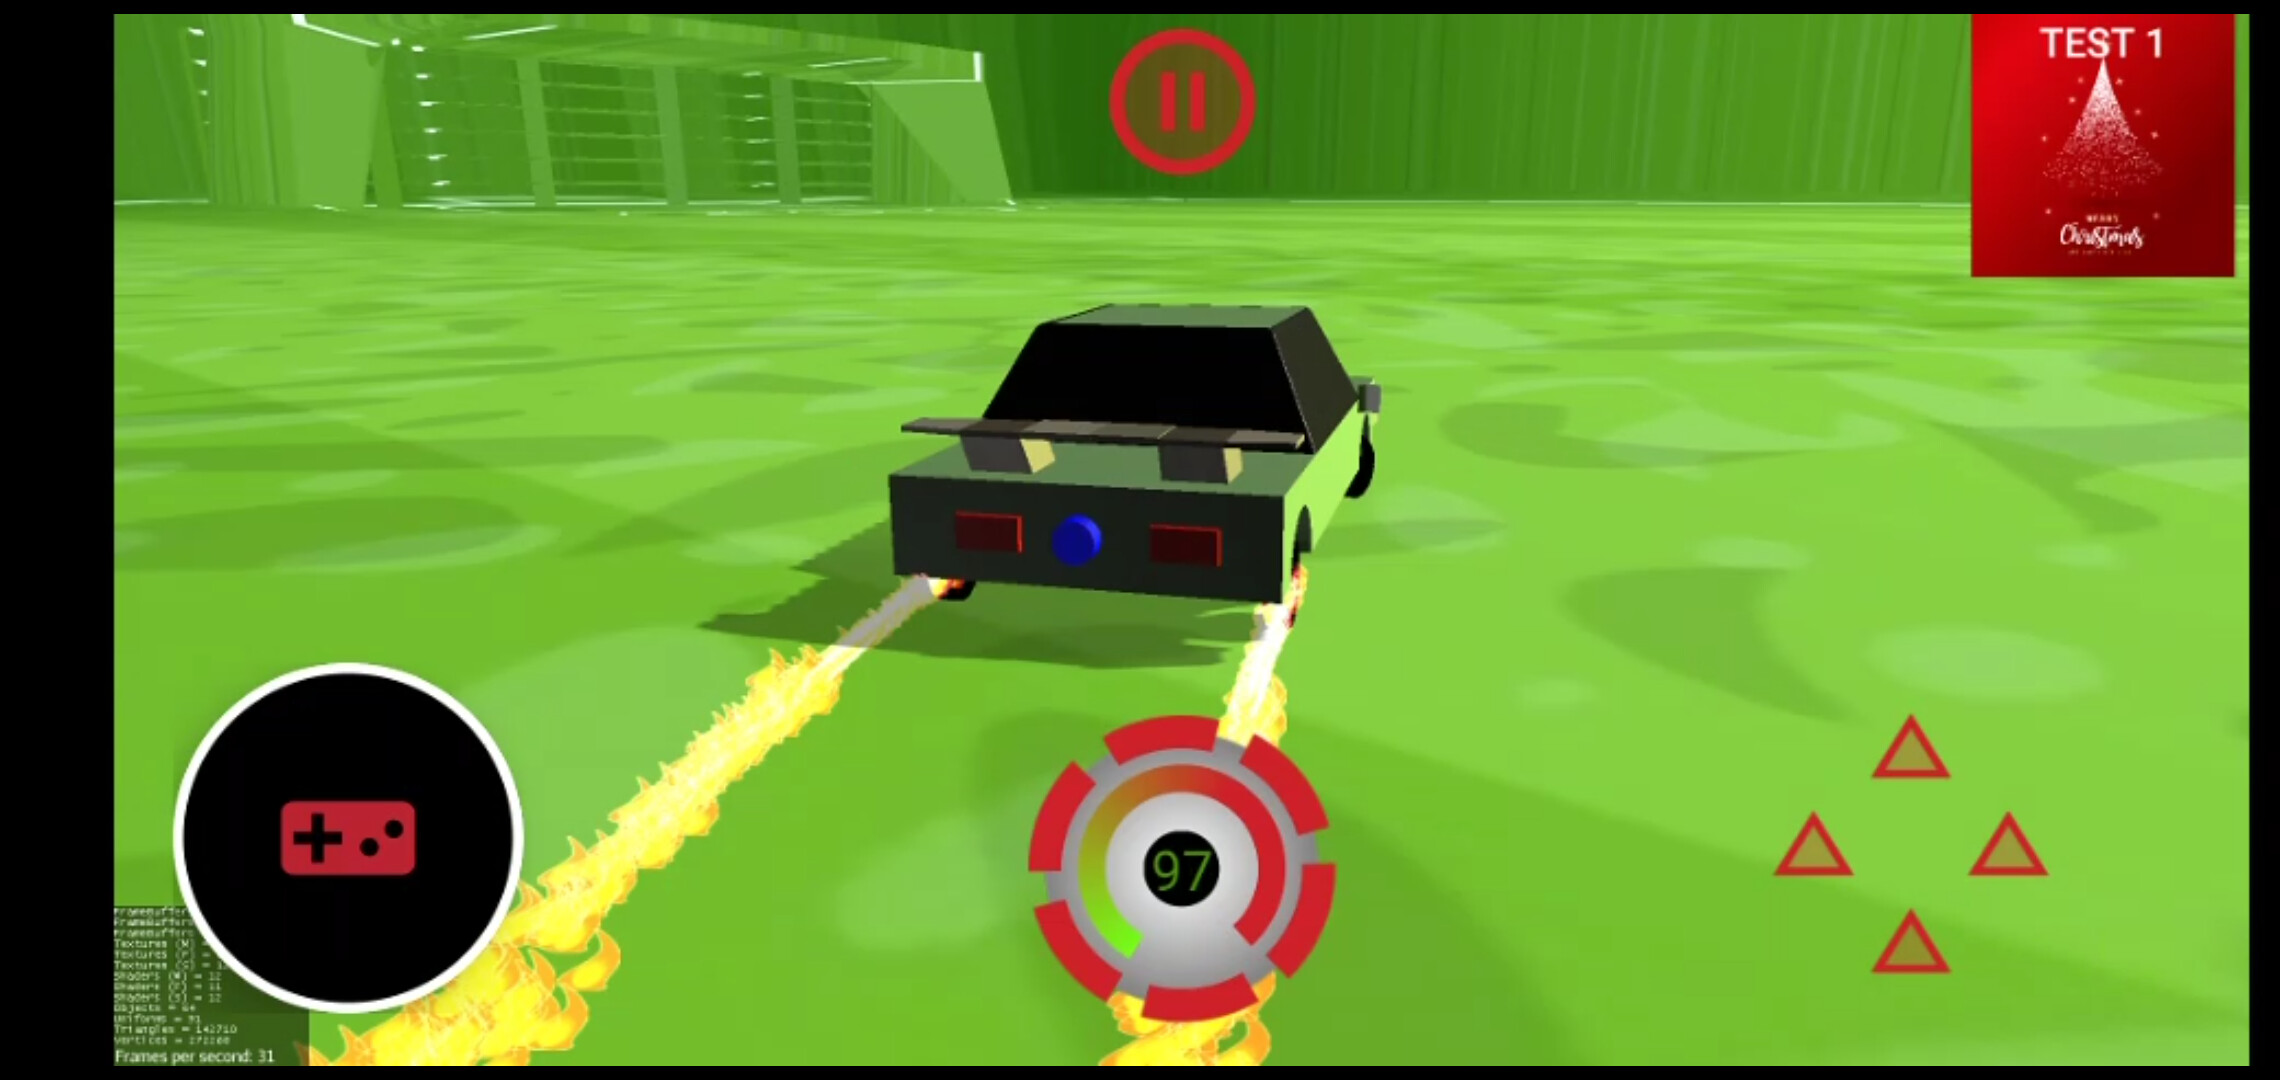
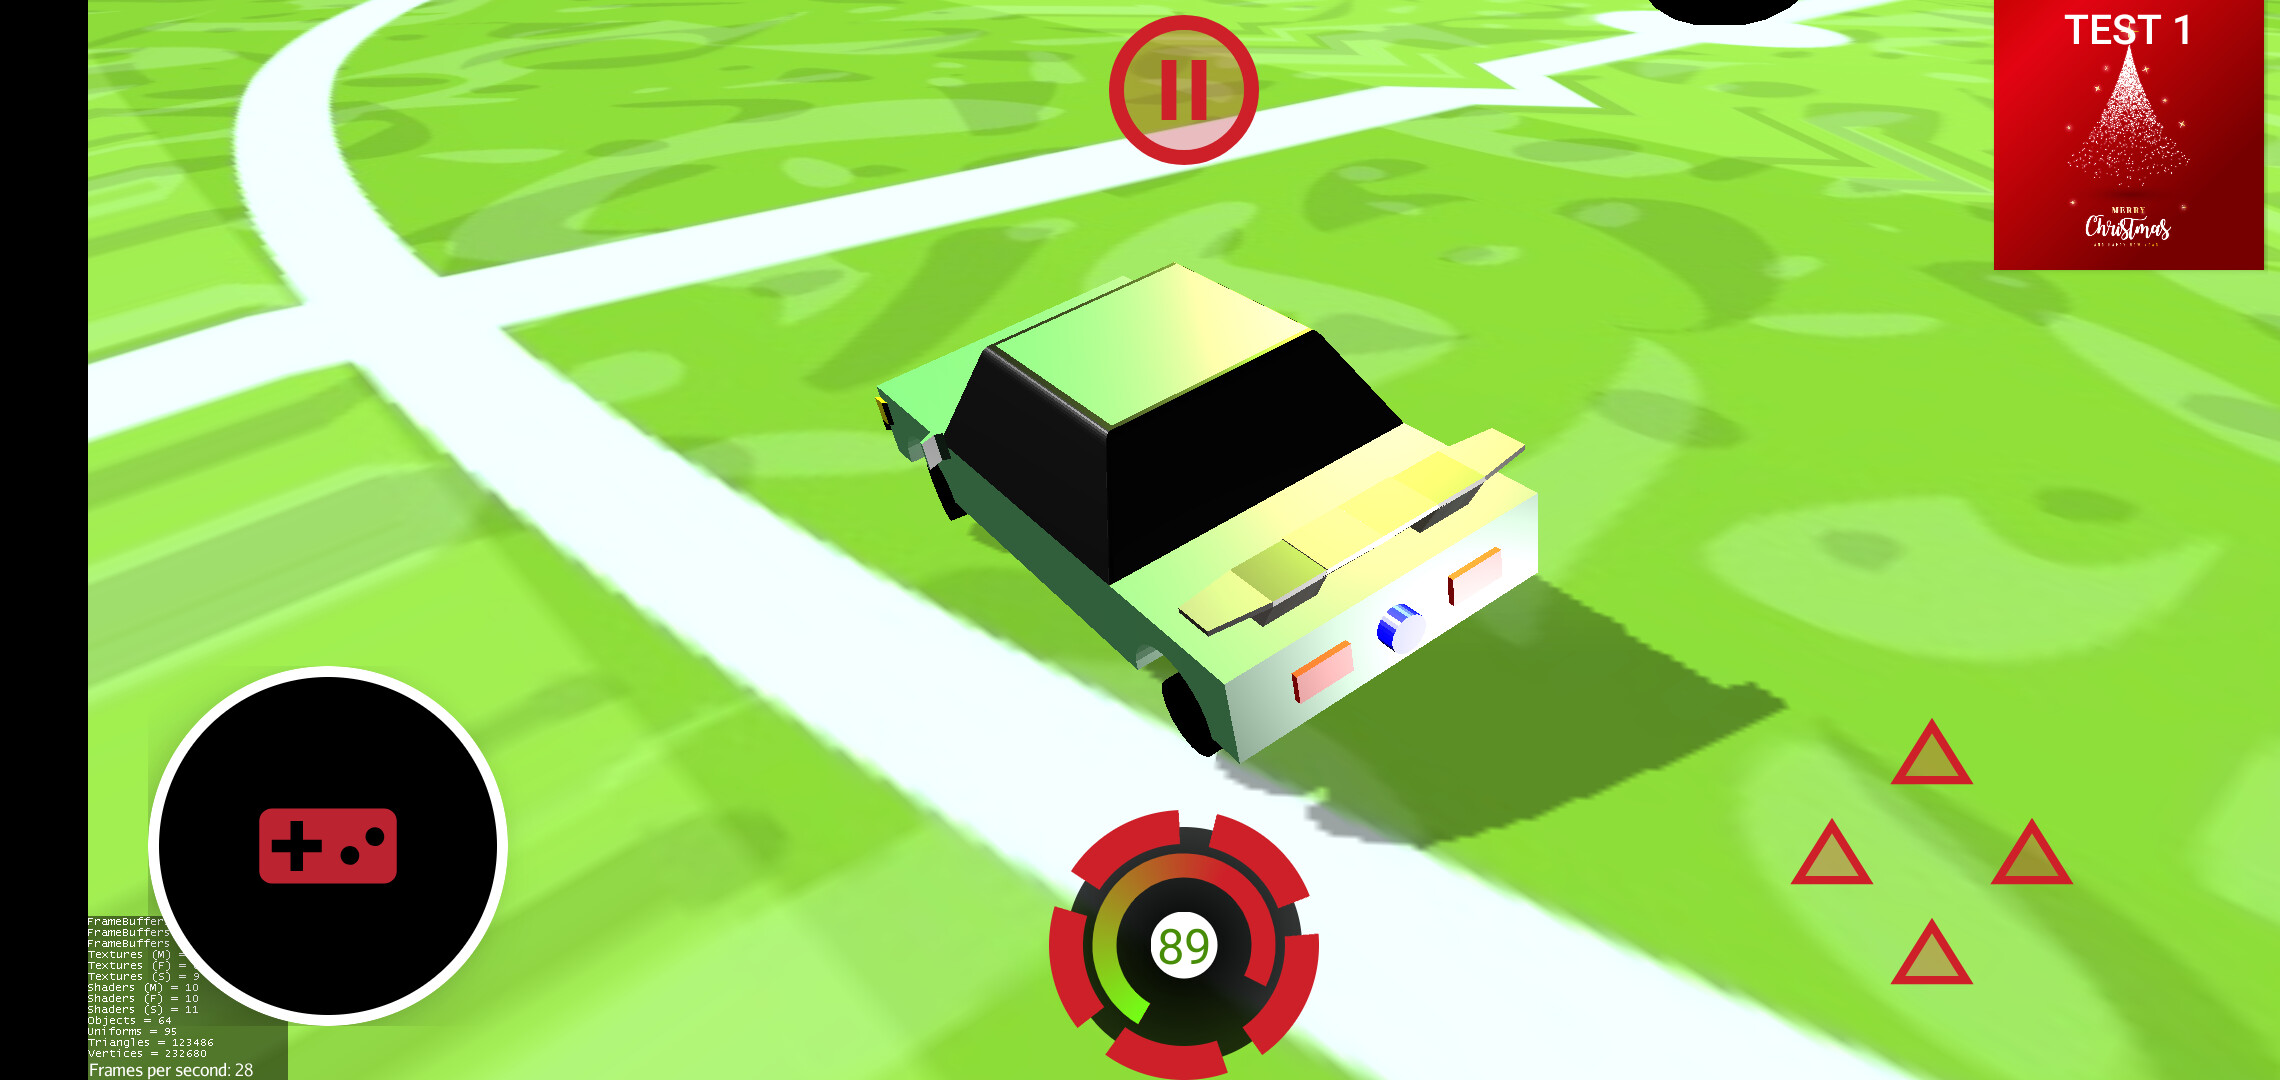
Have done the speedometer(bar shaped) using Android progress Bar view with inertia listener as a BaseAppState, I have also added steering by device orientation vector matrix calculated from geomagnetic field sensor & acceleometer sensor , code update would be done soon on github 
 , Merry Christmas
10 Likes
Been playing around with new blocks I have recently added to my map editor and put together a block plotter script in groovy to speed up the process.
Here are some screenshots 


and in edit mode

Note, do not mind the low fps, it is caused by the screen capture app!
10 Likes
What are you building ?
It is a map editor which is a part of my JME RPG project with tools and editors that I will use to create my game. (eventually these tools will be open-sourced after my game is released)
Idea is to use the mapgen2 for randomly generating a 2d island map, then I will use it as a prototype for building the actual 3D map in my editor. And I am using Blocks library for this.
4 Likes