Another strange case:
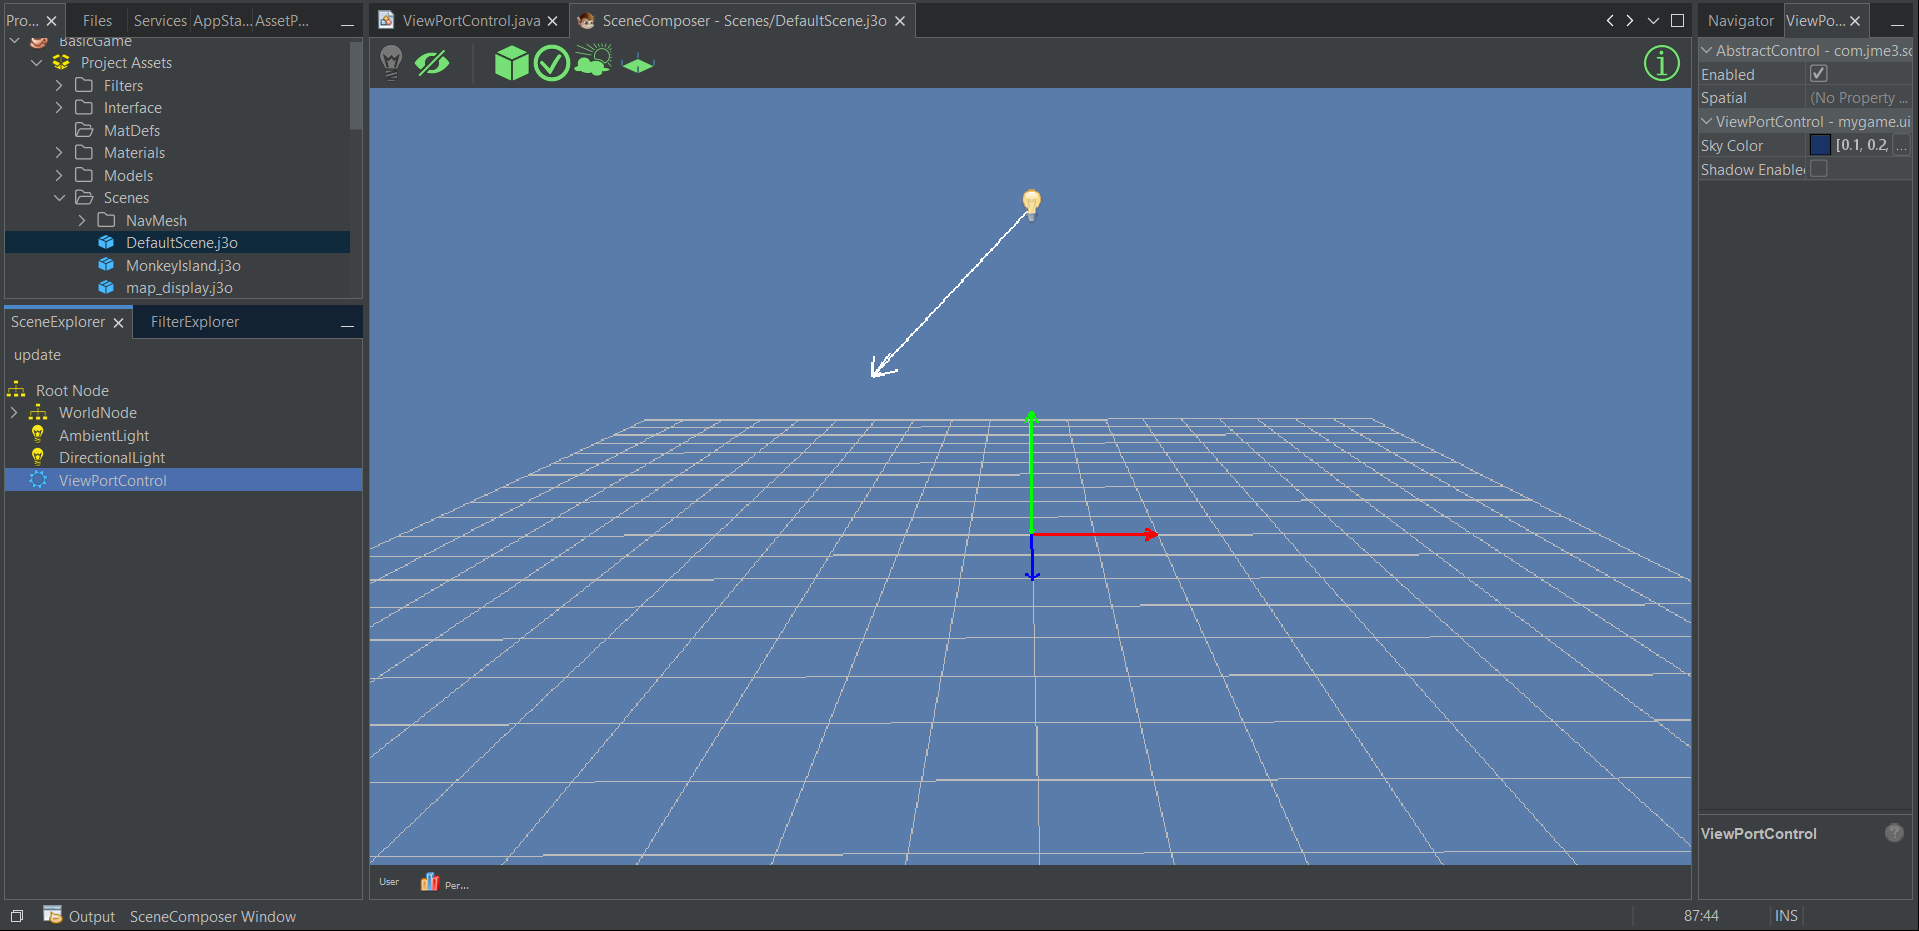
If I change the background color of the ViewPort via an AbstractControl, the color is permanent even if I open another j3o file. Something in memeory that is not reset?
First I create a scene and add my custom AbstractControl to the rootNode.
My guess is that SDK uses a single instance of viewport for rendering scenes, which means that even if you switch the scene, the viewport wouldn’t change.
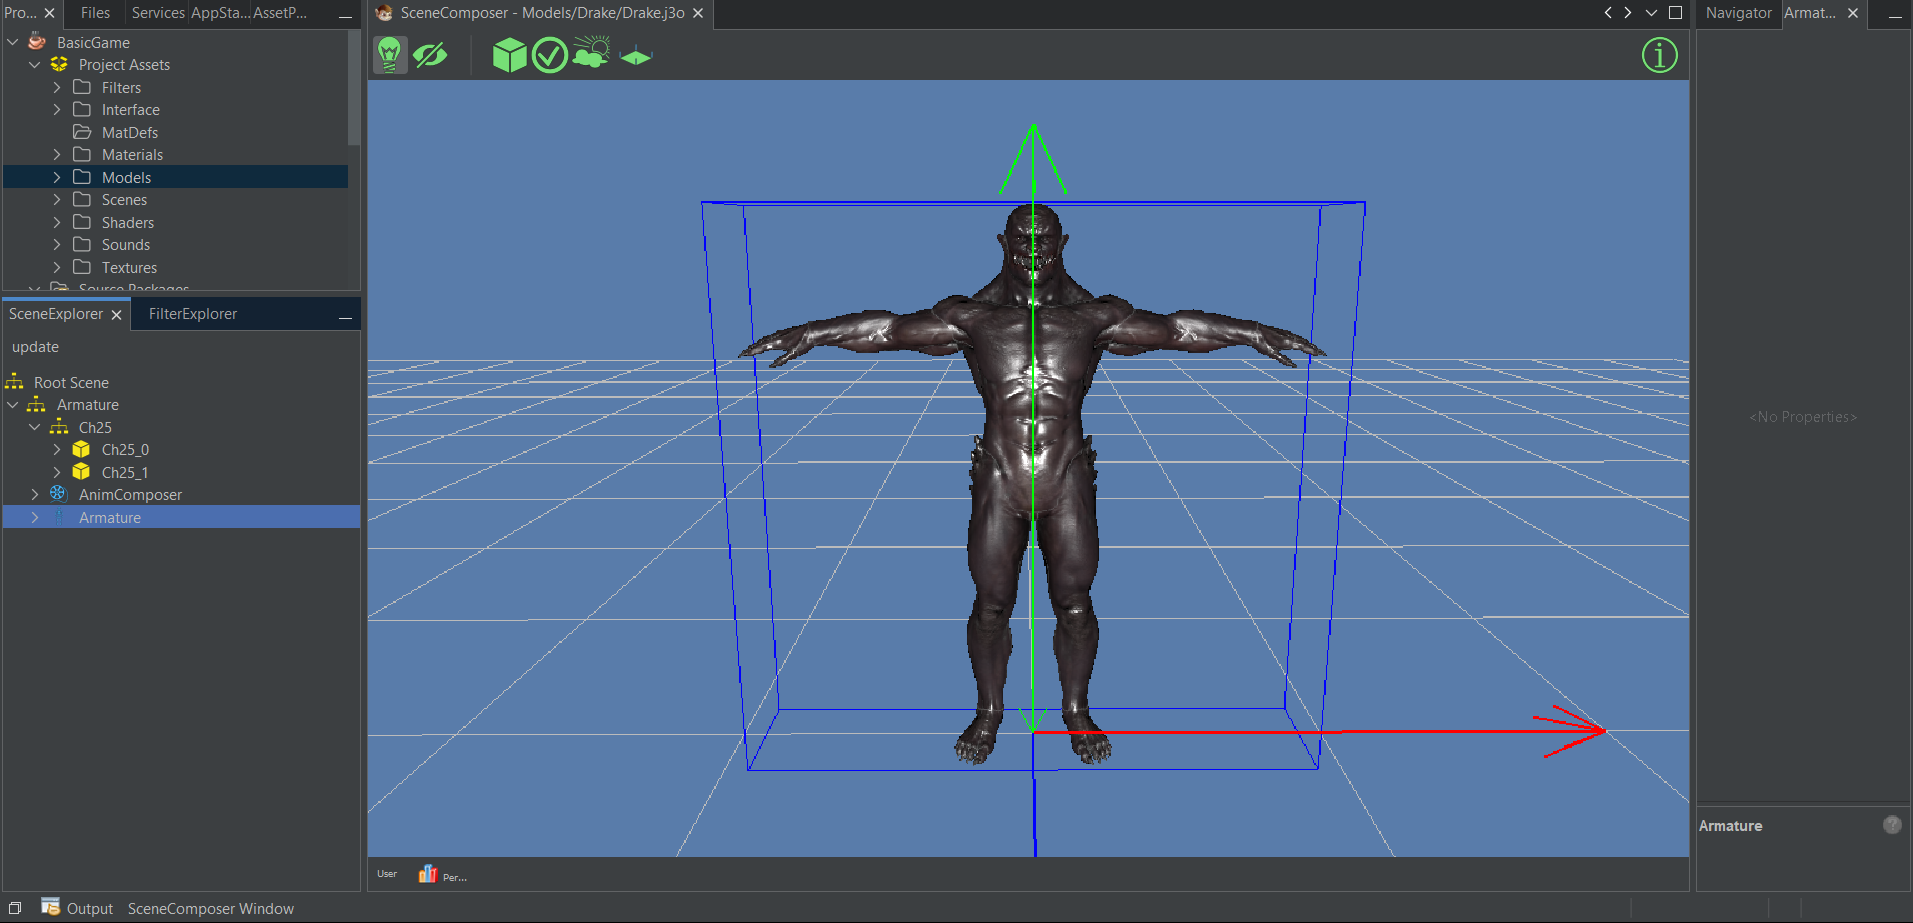
Another strange thing:
Maybe I’m getting confused, but is the grid size not symmetrical by any chance? With these dimensions 19x19 it doesn’t seem centered in the origin. I guess it needs to be increased to 21x21 to be symmetrical.
The red box has dimensions x=10, y=1, z=10 and is centered in 0,0,0
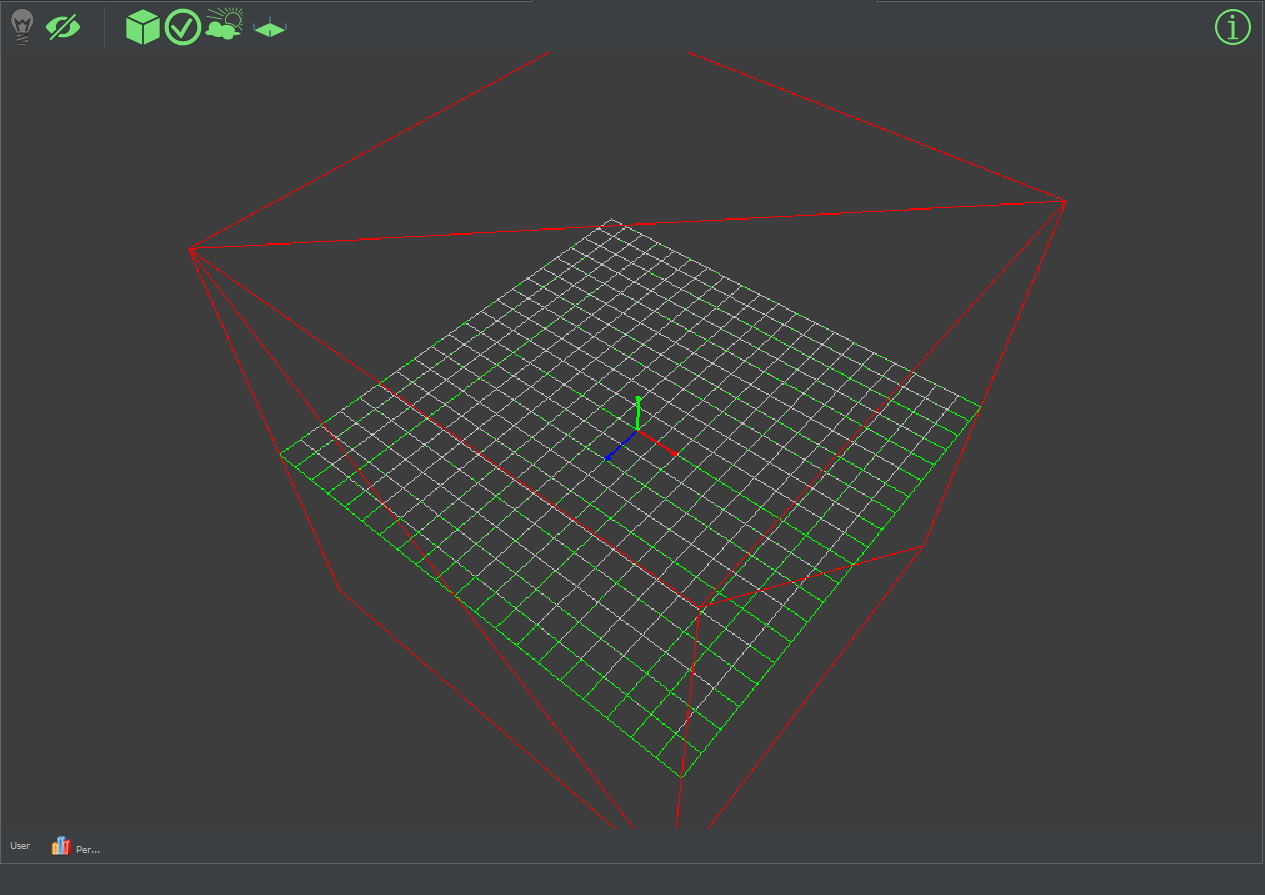
Confirmed, the reference grid is not symmetrical with respect to the origin point (0,0,0).
In gray the original grid 19x19 and lineDist=1, in green the test grid 21x21 and lineDist=1
        Geometry geo = new Geometry("WireGrid", new Grid(21, 21, 1f));
        Material mat = new Material(assetManager, "Common/MatDefs/Misc/Unshaded.j3md");
        mat.setColor("Color", ColorRGBA.Green);
        mat.getAdditionalRenderState().setWireframe(true);
        geo.setMaterial(mat);
        geo.center().move(new Vector3f(0, 0, 0));
        rootNode.attachChild(geo);
To solve the problem, the grid should be 21x21 with lineDist=1
The dimensions of the red cube are 10x10x10
Hi @tonihele ,
I am glad to know that my feedback was taken into consideration. I really appreciate the work you and the other contributors are doing.
I usually don’t install the SDK, but download the portable version jmonkeyplatform.zip and then unzip it on my computer.
Are you telling me that I can clone the SDK project from git and by running the ./gradlew run statement I can generate the jmonkeyplatform.zip file ?
Is there a guide or template on how to write jme plugins for the SDK ?
Not exactly. The zip is part of the release process which is a bit harder thing as it requires Ant and all that. If you have Linux, then you are good to go but this setup requires some difficult steps in Windows. But that being said, I have only done this maybe twice in my life to test something. As this is not necessary and I don’t think you need that either.
The gradle run, as with all Gradle apps, runs the application. In this case the SDK. And this is what you want to do whether you are testing it out or developing it. You do notever need to make a distribution version and run that.
So you can either just simply download the code snapshot or clone the repo (cloning recommended). And with gradle run the SDK will start normally. And one can even use it straight like that to develop your projects.
I’m not sure is there any guides available. But the SDK is just Java + Swing + Netbeans Platform. By looking at the existing modules, it is pretty easy to create a module of your own. We are here to help, Netbeans platform related questions are best to be asked in the Netbeans platform mailing list (rarely needed I’d say…)
Great! I use Windows, so can I clone the SDK project locally, open it with Eclipse, make some changes and then run Netbeans with the SDK via the /gradle run command?
If so I will give it a try as soon as possible.
If I make other changes to the code, then I have to close Netbeans and relaunch it via gradle from Eclipse right?
I don’t have to delete the .jmonkeyplatform folder under the <User> directory each time right ?
I’m little bit confused about the terminology here. Lets agree that Netbeans and SDK are separate products. This is also more clearer this way since you will actually get a local copy of Netbeans when you do the Gradle build. The Gradle run will run the SDK, not the Netbeans per se. This is just the terminology, for clarity.
You can open the SDK as Gradle project in any IDE. The IDE then just treats it as a normal Gradle project and that most likely works. I however have never done this. The SDK is actually two different things. It is a Gradle project yes, but also Ant based Netbeans Platform project.
If you intend to do some developing on the SDK, this is beyond trying it out, I would suggest you do it like I do:
Clone SDK repo
Run gradlew run (Windows)
Netbeans will be downloaded for you in this process under netbeans folder
Delete the Gradle files (build.gradle, gradle.properties, settings.gradle, version.gradle). With this the SDK stops being a Gradle project and is only a Netbeans Platform Ant project
Open the Netbeans that was downloaded: /netbeans/bin/netbeans64.exe
In Netbeans open the SDK Netbeans Platfrom Project
Enjoy coding and use the giant PLAY-button to compile and run the SDK
The SDK development will use local settings folder and it will not mess up your production settings. In Netbeans (if you followed my advice above), clean will clear the development SDK settings as well and you get to start over.
Eventually we are trying to get to Maven. So that it would be a native Netbeans Platform project. Currently the Gradle is used to do some magic glue stuff that Ant can’t (or is too difficult) do. With Maven, hopefully all this hassle will go away as everything is behind one build system. But at least for simply trying out the SDK, this current system is still very easy. As it just looks and functions like every other Gradle project. And the only hassle comes when one starts to develop it, as it is better to open up as a native project in Netbeans and it can’t be done straight (need to delete the Gradle stuff).
As you can see, some forms do not fill out.
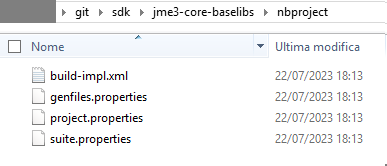
By pressing the giant Play button I get this error:
ant -f C:\\Users\\xxxxx\\git\\sdk run
C:\Users\xxxxx\git\sdk\netbeans\harness\suite.xml:106: Cannot open C:\Users\xxxxx\git\sdk\jme3-core-baselibs\nbproject\project.xml
BUILD FAILED (total time: 0 seconds)
Yes, I ran the command and the NetBeans download started. After that I deleted the files as per your instructions; then I opened NetBeans and imported the SDK project.
This project.xml, for this module and few others are actually generated by the Gradle build…
Still curious what the gradlew run output was then.
Edit: I don’t know how familiar you are with version control stuff. But what I do it use a GIT client called GitKraken. With that it is easy to just reverse the changes I made (the gradle files deletion…) to jump back to the Gradle build.
Sorry, I shouldn’t bother you during the vacations. I will try to re-run all the steps you wrote in a few days. Thank you very much anyway for the support. Let me know when you are available again. See you soon, have fun