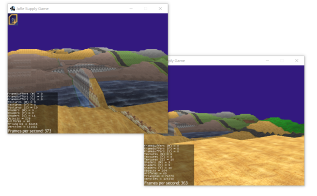
Well, i think you may try a custom render window for a single jme app, as BaseAppStates & on one of them you can display that HUD(if you insist on separate windows), using AWT-Panels or Swing Canvas on a JPanel & JFrame, example :
BUT, add this snippet before that line, :
JPanel container = new JPanel("Jme Window 1");
conatiner.setSize(canvas.getWidth(), canvas.getHeight());
conatiner.add(canvas);
jframe.getContentPane().add(conatiner);
I don’t have more examples for this, just one, & it’s not mine, Orthogonal MiniMap By jayfella :
/*
 * To change this license header, choose License Headers in Project Properties.
 * To change this template file, choose Tools | Templates
 * and open the template in the editor.
 */
package MiniMapWorld;

import com.jme3.app.Application;
import com.jme3.app.SimpleApplication;
import com.jme3.app.state.BaseAppState;
import com.jme3.material.Material;
import com.jme3.math.FastMath;
import com.jme3.math.Quaternion;
import com.jme3.math.Vector3f;
import com.jme3.renderer.Camera;
import com.jme3.renderer.ViewPort;
import com.jme3.scene.Geometry;
import com.jme3.scene.Node;
import com.jme3.scene.shape.Quad;
import com.jme3.texture.FrameBuffer;
import com.jme3.texture.Image;
import com.jme3.texture.Texture;
import com.jme3.texture.Texture2D;

public class MiniMap extends BaseAppState {

    private final int minimapSize;
    private final float height;

    private Camera mapCam;
    private ViewPort mapViewport;
    private Geometry minimap;

    private final Node mapRoot;
    private Node guiNode;

    /**
     * Creates a new MiniMap and displays the scene specified.
     * @param mapRoot   The scene to display in the minimap, for example the rootNode of your game.
     * @param height    The height the minimap will display from. Generally slightly higher than your maximum world
     *                  height.
     * @param size      Map Size
     */
    public MiniMap(Node mapRoot, float height, int size) {
        this.mapRoot = mapRoot;
        this.height = height;
        this.minimapSize = size;
    }

    public Node getMapRoot() {
        return mapRoot;
    }

    public ViewPort getViewport() {
        return mapViewport;
    }

    @Override
    protected void initialize(Application app) {

        /**
         * setting up the a new Camera to create a Satellite Capture ... Prependicular camera plane
         */
        mapCam = new Camera(minimapSize, minimapSize);
        mapCam.setFrustumPerspective(45, 1f, 1f, 300);
        mapCam.setParallelProjection(true);
        setMapHeight(mapCam, height);
        mapCam.setLocation(new Vector3f(0, height, 0));
        /**
         * Adjust the camera view direction to look at the roof of objects with respect to the prependicular extension Y
         */
        mapCam.lookAt(new Vector3f(0, -1, 0), Vector3f.UNIT_Y);

        /**
         * Create a new ViewPort renderer
         */
        mapViewport = app.getRenderManager().createMainView("Offscreen View", mapCam);
        mapViewport.setClearFlags(true, true, true);

        /**
         * create a frame to hold the new ViewPort
         */
        FrameBuffer offBuffer = new FrameBuffer(minimapSize, minimapSize, 1);
        /**
         * create a 2D texture that holds the ViewPort Renderer
         */
        Texture2D offTex = new Texture2D(minimapSize, minimapSize, Image.Format.RGBA8);
        offTex.setMinFilter(Texture.MinFilter.Trilinear);
        offTex.setMagFilter(Texture.MagFilter.Bilinear);

        /**
         * use the offTex as a color Tex for framebuffer to display the viewPort render colors ..etc
         */
        offBuffer.setDepthBuffer(Image.Format.Depth);
        offBuffer.setColorTexture(offTex);

        /**
         * Create a Geometry Spatial that will hold the frameBuffer in a quad shape
         */
        minimap = new Geometry("MiniMap", new Quad(minimapSize, minimapSize));

        /**
         * doing the tex & mat stuffs , evaluate the miniMap geom material(MiniMa to use the offBuffer colorTex(Tex2d)
         */
        minimap.setMaterial(new Material(app.getAssetManager(), "MatDefs/MiniMap/MiniMap.j3md"));
        minimap.getMaterial().setTexture("ColorMap", offTex);
        /**
         * change the shape(Tex) of the minimap object itself not the renderer ,
         * its called the overlay(for the overall shape) & Mask or oeverlay skin for the color of the overlay
         */
        minimap.getMaterial().setTexture("Mask", app.getAssetManager().loadTexture("Textures/MiniMap/circle-mask.png"));
        minimap.getMaterial().setTexture("Overlay", app.getAssetManager().loadTexture("Textures/MiniMap/circle-overlay.png"));

        minimap.setLocalTranslation(
                app.getCamera().getWidth() - minimapSize ,
                0f,
                1f
        );

        /**
         * set the output of the produced viewPort to be in that seprate frameBuffer
         */
        mapViewport.setOutputFrameBuffer(offBuffer);

        /**
         * attach the scene(RootNode or Node you wanna get its view) to the viewPort
         */
        mapViewport.attachScene(mapRoot);

        /**
         * getting the game guiNode
         */
        guiNode = ((SimpleApplication)app).getGuiNode();
        /**
         * attaching the map to the guinode as a rendered 2D Texture
         */
        guiNode.attachChild(minimap);
    }


    @Override
    protected void cleanup(Application app) {
        getApplication().getRenderManager().removeMainView(mapViewport);
    }

    @Override
    protected void onEnable() {
        guiNode.attachChild(minimap);
    }

    @Override
    protected void onDisable() {
        minimap.removeFromParent();
    }

    private final Quaternion mapRot = new Quaternion();
    private final float[] angles = new float[3];

    @Override
    public void update(float tpf) {

        getApplication().getCamera().getRotation().toAngles(angles);

        mapRot.fromAngles(FastMath.HALF_PI, angles[1], 0);

        mapCam.setRotation(mapRot);

        mapCam.setLocation(new Vector3f(
                getApplication().getCamera().getLocation().x,
                height,
                getApplication().getCamera().getLocation().z
        ));

    }

    private void setMapHeight(Camera camera, float factor) {
        float bottom = camera.getFrustumBottom();
        camera.setFrustumBottom(bottom * factor);
        float left = camera.getFrustumLeft();
        camera.setFrustumLeft(left * factor);
        float right = camera.getFrustumRight();
        camera.setFrustumRight(right * factor);
        float top = camera.getFrustumTop();
        camera.setFrustumTop(top * factor);
    }

}
this displays an orthogonal view to the current jme viewport scene with different camera view inside an app state.
The answer is yes.
