Didn’t see a thread, so here’s a new one!
Here’s a video of some of the scenarios in our fire extinguishing VR training system:

Also working on this is forum veteran @1000ml. There’s a third guy as well, but I don’t have his forum name atm.
Didn’t see a thread, so here’s a new one!
Here’s a video of some of the scenarios in our fire extinguishing VR training system:
Also working on this is forum veteran @1000ml. There’s a third guy as well, but I don’t have his forum name atm.
Pretty good. Is this committed by anyone or is it a voluntary project?
It’s a commercial effort, run by this company: https://realtraining.no/
I’ve been working on some game for the past few weeks, and to be honest it’s probably the best game I’ve (nearly) finished so far!
The name of the game will be called Techn0Haunt, and it’s a wave-based shooter where you have to take down enemy robots named T.F.R for the sake of humanity! I have a huge story behind it, but the important part is that I actually got something almost done! 
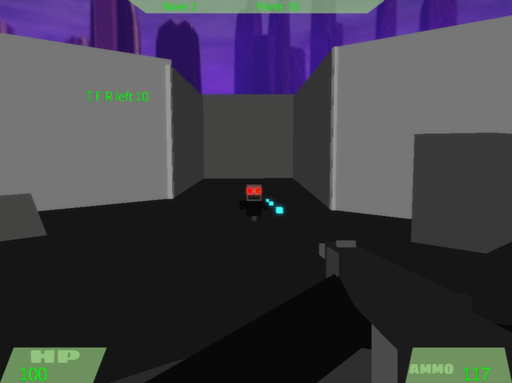
IKR, shoot The Fucking Robot!
… I really like the little robot there. Reminds me of that cleaning robot from Wall-E name M-O.
I have a title screen & 3 working game states:

the color of the light shifts from red to green to blue, just not in the gif, because indecision.
EDIT:
Bonus: The node setup in Blender I came up with for “moving the light” was satisfying, the x position gets animated with 2 keyframes. The light comes from an emssive geometry , see picture. This animation gets baked in Cycles to the unwrapped mesh, creating many sprite images, that get combined into one sprite map, that is passed to the shader (PBR in this case) as a light map and played back frame by frame. The color is also tweaked at this point.
Result = Cycles quality, non interactive lighting for the cost of a texture lookup.
I have a tonne of modular sci fi parts I’m using for various projects, it uses these to build different rooms
https://streamable.com/nlxfk
https://streamable.com/az534Woah the final 3D level generation is really well done.
Hmmm… video links are “403 Forbidden” here.
It does that when opened in a separate tab for me but the forums load and play it just fine.
Have you tried browsing in something that isn’t Netscape Navigator? 
I get ‘No video with supported format and MIME type found.’ They were fine when I posted. If I edit the post they come back for about 20 minutes then back to the error. Anyway added the links separately.
@MoffKalast thanks
Trying to teach myself character modeling…

Hey, it’s better than anything I can do! I can barely make a block character correctly!
This guy’s tutorials seem pretty good: https://www.youtube.com/watch?v=aAO4C_8y0w8
Though it was interesting that due to some long-ago figure drawing classes that I’ve had, I’d already made many of the corrections to the mesh that he ended up doing in the end. Made me feel better.
Edit: I’d also already watched his whole series making a walking/running cowboy which I guess was probably a good foundation for this more complicated one.
IMHO understanding correct edge flow for humanoid characters is paramount, it will help explain where to place edges and verts and often why. I always have a reference image or two open from google of the “best” edge flow for a particular body part.
Thanks for the links… lol.
Anyway, have to start somewhere. I don’t think the edge flow in that guys tutorials is that bad.
The shoulder topology is not that good.
It should look like this (with more or less definition)

I recommend this video from cg cookies on torso topology flow.

The flow is very important once you start to animate your character, so it deforms properly. The problem is when you are in the animation phase… it’s often hard to come back and fix the flow, because you may already have textured your model.
Edit: Also the shoulder is the most difficult to get right in my experience, but also one of the most critical part because the arms are most often very mobile in animations.
Sure. Just for some background, the reason I started down this path was mainly because I was trying to help my son create a model for 3D printing for a project for school. He has since abandoned that as too much for the time frame but is still interested in learning. I kind of believe trying to explain topology to him will be difficult at this stage so I’m going to see how far we will get with these tutorials (I’m doing them first and then will mentor him through them).
For his original model we were working from reference imagery and were just going to straight-up create a direct 3D non-posable version… because of time constraints. But now that there are no more time constraints and he likes to ‘design’ the idea of creatures, I thought I’d start him off somewhere simple and see how far we get.
The first tutorial series with the cartoonish cowboy was pretty good and even though the shoulders required lots of weight repainting (in the video) to get nearly-decent results, it frankly would have been “good enough” for this project.
So I’m going to see how far I get with these tutorials and then decide how much to dump topology on his head… and all of the balancing joys that come with that.
Tonight was night 2 and tutorial 2… so I got to make an armature. Easy-peasy for you experienced guys.
Playing around with random odd poses with the (crappy) automatic mesh weighting:
https://imgur.com/DeZxEru.png
Kind of fun, though.
Tomorrow night’s tutorial is on weight painting.